CUSTOM LEVEL DOCUMENTATION
INTRODUCTION
Demon Turf's Custom Level Documentation
In Demon Turf you can create and share your own levels on Steam. This page will guide you through the process from start to finish. We'll also include a FAQ section at the very bottom. If you have more specific questions or want to chat directly to other creators and the devs: Join our discord! For any further inquiries you can also contact us via e-mail here.
License to use: Any scripts & assets provided via this tool are proprietary to Fabraz and can only be used in the conjuction of uploading levels to Demon Turf and can not be used on any other application. Fabraz also isn't responsible for the type of levels you upload and that responsibility lies solely in the level's uploader. Fabraz also claims no ownership over the tools used for modding purposes such as Unity.
SET UP
How to set up everything you need
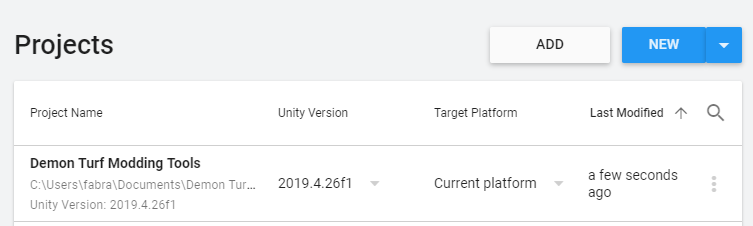
Once you own Demon Turf on Steam you should have access to another item in your library called "Demon Turf Level Creator". Installing this will create a Unity project in whatever folder path you choose. (By default it's C:\Program Files (x86)\Steam\steamapps\common\Demon Turf Level Creator)
NOTE: You need to own Demon Turf on Steam for this to work. You will automatically find the tool called "Demon Turf Level Creator" in your library if you do and won't even have to click the button above.
Now you'll need to install the correct version of Unity (2019.4.26f) to properly open and build levels.
After Unity is installed, starting the Level Creator from Steam will open the Unity project and you can get creating! In case you're having trouble finding the path to the Level Creator, in your Steam Library you can right click "Demon Turf Level Creator" and hit "Manage > Browse local files" to reveal the location and path in File Explorer/Finder. The first time opening the project it can take a couple minutes for Unity to import and setup the project.
Besides the initial setup, an optional extra step that we recommend is setting up version control for your work in the Level Creator. There's nothing worse than losing days or weeks of effort due to one mistaken input, and this is an essential tool to avoid such mishaps. Git via GitHub or Bitbucket are both good solutions from our experience. You can also download the Level Creator from our Git repository as well, and there's some files you could copy like .gitignore if you want to setup version control for your project.
CREATING A LEVEL
Make sure to follow these instructions
Creating these levels will require a basic knowledge with Unity. Once you're in the project feel free to set up any layout you want.
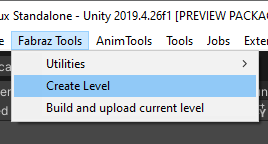
To start the process head on over to Fabraz Tools in the top Menu Bar and click on Create Level. This is going to prompt you to create a new scene that includes all of the essentials. They are commented for context too. The following are important level wide managers:
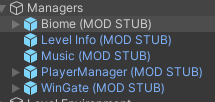
- Managers, Biome: This is where you can set the game's available environments. This determines the skybox, scene lighting, scene fog, directional light etc. You can also slot in your own with CUSTOM. The Kill Plane & Out of Bounds area are also set here via the children.
- Managers, Level Info: This is where you set all the settings for the level for Steam's Workshop. More on tha in the next section "UPLOADING A LEVEL".
- Managers, Music: This is where you can set the game's available tracks. You can also slot in your own with CUSTOM. This can either loop based on the runtime, or you can use the dynamic music system for more seamless looping or involved musical transitions.
- Managers, PlayerManager: This sets the starting point for the player in the level, so make sure to set it properly in the scene viewer. The small white orb is where Beebz will spawn, it should be visible and above the ground.
- Managers, WinGate: Similarly to the PlayerManager, this determines the end of the level so make sure to set it properly in the scene viewer.
- Level Environment: This is where you can place everything else that makes up your level. More details below.
These are some of the possible assets you can add or create:
- Level Environment, Platforms: Anything collidable in the game needs to be set to the "Platform" or "Physical" layer. AI pathfinding uses the "Platform" layer only, so more dynamic parts are better suited to the "Physical" layer instead. If you want the camera to clip with it, set the "NoClip Platform" tag. You can create the environment using ProBuilder! (Check out its own documentation on how to build meshes in Unity and texture them etc.) You can also import your own meshes and do whatever you want, really.
- Level Environment, Decorations: You can find most decorations found in-game under Prefabs > Decorations. You are, of course, welcoem to make your own as well.
- Level Environment, Hazards: You can find most interactables, like deadly spikes, found in-game under Prefabs > Hazards. You can change their variables in the scene (not on the prefab itself) and it will reflect in the level.
- Level Environment, Enemies: You can find most enemies, like shooting Apocadesertians, found in-game under Prefabs > Enemies. You can change their variables in the scene (not on the prefab itself) and it will reflect in the level.
- Level Environment, Items: You can place as many lollipos as you want, there are several types, and the level will account for them in the GUI to indicate them as collectables. (Note, these will not add to your total count in the main game hehe)
- (NEW) Neon: This folder contains a lot of new interactables & hazards carried over from the mini-sequel "Neon Splash"! Like the 2D zones for example!
An important concept in Unity to be aware of when getting started is Prefabs. Put simply, Prefabs are saved objects that you can configure however you need that can then be used in proper levels. These can include Enemies, Hazards, or special Interactable mechanics from the main game. Most prefabs should be self-explanatory but here are a few helpful tips on how to use them or other gameplay components!
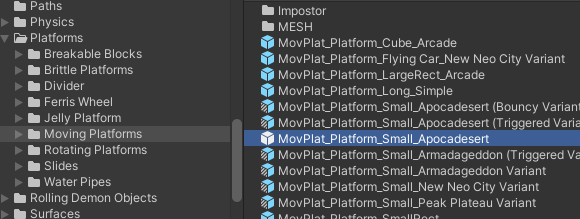
- Moving platforms always require the path prefab as a reference as well to determine where they go.
- Trigger zones, like combat zones, require the "PlayerTrigger" layer to recognize the player entering & exiting the trigger collider.
- Teleporters have a reference to a GameObject to know where to teleport too.
- You can create an object with a collider set to "isTrigger" and on the "Trigger" layer, and add the "TriggerEvent" component to add custom gameplay events and encounters. See the QA at the bottom for some examples of ones we often use.
If you have more specific questions about prefab behaviors, join our discord and ask the devs directly.
You can also use some of the existing scripts on your custom game objects to create your own hazards/interactables, the world's your oyster.
systems are handled by the game upon loading your level, and adding conflicting elements should be avoided. This includes the Camera, which will spawn in, as well as a Directional Light (the stand in for the Sun) which is tied to the Biome you select unless you choose "BiomeID.CUSTOM"
ADVANCED TECHNIQUES & CONSIDERATIONS
Transparency
Transparent things are great! Unfortunately they're surprisingly complicated technically speaking. Certain graphical effects used in Demon Turf (like Depth of Field and Volumetric Fog) break down when rendered through a transparent object. When possible we'd recommend setting new Materials to render as a Cutout instead of Transparent. This allows for objects to be see through while maintaining the visuals, you just can't have a partially transparent object.
Surface Properties
You can apply special characteristics to surfaces using scripts found in the "Scripts > Player > Surface Tags". These can block certain actions such as "NoWallCling" or "NoCheckpoint", or trigger additional behaviors like "Surface_AutoWallJump" or "Surface_AdjustAcceleration"
Challenge Zones
The game makes use of several challenge zones the player can enter that require performing specific tasks to "complete", often to open a door, extend a bridge, or reveal a collectable. These include:
- Combat Zones: Either single or wave based, acting as arena fights that task the player with defeating all enemies to complete.
- Race Zones: These task the player with racing from beginning to end within a time limit. There's also a Demon Soccer Golf variant that instead requires getting the ball to the end.
- Ring Zones: Obstacle courses that act as a more detailed routing challenge next to the race zones. Get through each ring in sequence before it closes!
- Collectable Zones: These are scavenger hunts requiring the player to track down every key in the zone to complete it. Their sweets arrow also resets to track the keys in these moments.
- Curse Zones: These zones allow you to limit certain player abilities, mixing up their options for how to complete your level.
Camera Overrides
Sometimes it is helpful to override the typical camera logic. These can be found in "Prefabs > Interactables > Camera Overrides".
- Cutaway Shot Override: This freezes the gameplay and cuts away to a different perspective. Useful for highlighting a change in a distant location, ideally with something notable to let the player more easily identify it. You can use the "CamerCutTimescaleIgnore" component to override some behaviors to still update such as Animators, ParticleSystems, and Moving Platforms.
- Focus Shot Override: This temporarily orients the camera towards a point of interest. Useful for highlighting a change nearby, such as a door opening up after completing a challenge zone.
- Rotation Override: This is similar to the previous Focus shot override, but is instead tied to entering and exiting a zone and orienting in a specific direction. Can be used to build more 2D oriented sections or setup a specific camera angle. Does pose problems for using Punch and Turf Abilties due to their reliance on facing, but these can be temporarily disable with a Curse Zone if needed.
- Zoom Override: Scales the current camera distance by a certain factor. Can also be used in combination with the Rotation Override.
(NEW) NPCs
You can now place NPCs and write custom dialogue for them and Beebz as well! Check the new notes on the relevant prefabs to figure out how it works.
Proper Signage
Sometimes you just need to put things down in writing to get the point across. There's signs in "Prefabs > Interactables > Signs" that you can add to a level for any additional explanations or caveats.
Sound Ambience
Sound design is often an unsung part of a level design and how it feels to inhabit and navigate the space. You can make use of AudioSources that playOnAwake to have environmental sounds nearby, but we also have prebuild ambience prefabs for more level-wide sound effects with scripts to have them respond to changes like moving indoors. These can be found in Prefabs > Biomes > Ambient Sound Setups.
Dynamic Music
This is a more advanced system we used for our boss fights and hub music. At its simplest it allows for more seamless looping of tracks, but can also be used for much more intricate dynamic uses such as maintaing multiple sections and transitioning between them smoothly, layering multiple voices together, and more.
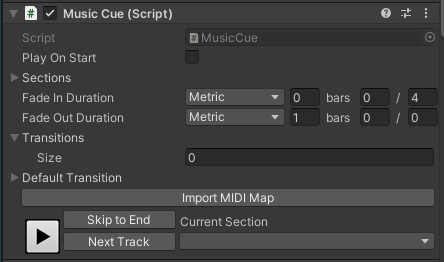
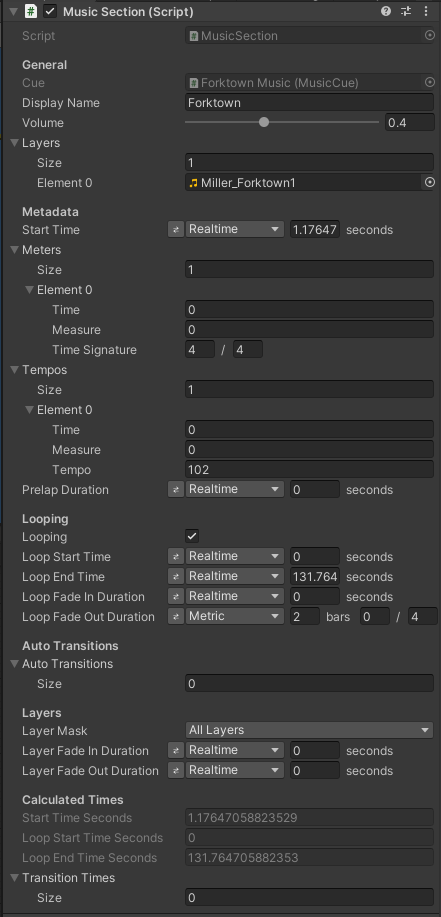
Setting the level music to custom and toggling on the useDynamicMusicSystem will add the starting components. The system is comprised of a MusicCue and any number of MusicSection components. With the MusicSections you plug in the audio track, and provide details about the track, such as bpm, its metre, and detail the different loop points. Meanwhile in the MusicCue, you can detail the different transitions that can occur between sections as well as methods for playing and transitioning between different sections. Many of the timing details can be specified in realtime seconds, or in bars and measures for the musical time, with the former likely being the easiest to work with unless you're directly the composer of the track.
(NEW) LUA SCRIPTING
Modify game behaviours for further customization!
While C# scripts cannot be added in via the level editor, the scripting language "Lua" can be used to add in various unique behaviours or adjust gameplay parameters to extend the provided set of scripts already present. The following will detail how to interface with the Lua system set up in the level editor, but for a proper understanding of using the Lua scripting language, check out other tutorials online to get started.
The Lua integration is handled in two parts, components provided to trigger user customized scripts, and endpoints accessed in Lua that connect back to gameplay parameters in C#.
Lua Components
These all start with "Lua", and can be found in "Assets > Scripts > ModSupport > LuaScripting". These are primarily different means of triggering custom Lua scripts based on different event criteria such as on Start, Update, or FixedUpdate (LuaScriptOnStart, LuaScriptOnUpdate, and LuaScriptOnFixedUpdate accordingly). There's also LuaScriptStandalone, which you can trigger via other Event components in the project for more complex reactions. All of these leverage the LuaScript data type, which can either hold a short set of script commands specified in the provided text field, or referenced lua text file. For any such file, the suffix needs to end in ".txt" to properly show up and be processed by Unity.
There are two other notable components are more for proper setup and coordination of scripts.
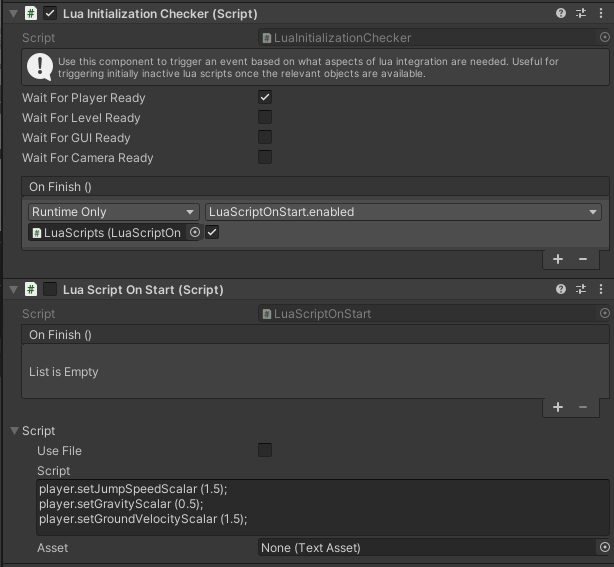
First is the LuaInitializationChecker. This component checks for the status of LUA endpoints and fires off an event when they are properly setup. This is useful to ensure scripts accessing the endpoints will only trigger once it is ready to do so. An example usage would be to have the LuaInitializationChecker with WaitForPlayerReady toggled, and a LuaScriptOnStart accessing the player starting disabled, with the latter then getting enabled in the former's OnFinish event. The player oriented lua script would then trigger with the needed Lua endpoints properly set up.
The other notable component is LuaSetObjectVariable. This contains user-supplied list of object and name pairings that will be fed into the Lua script instance using the supplied name as the variable name. These can then be accessed in other scripts for further usage. Based on which component is dragged into the reference, the type of the object changes, allowing different types to be set and controlled via Lua.
LUA Endpoints
These are the interfaces for adjusting core gameplay behaviours in Demon Turf. There are currently four different groups, found in "Assets > Scripts > ModSupport > LuaScripting > LuaInterfaces". These include:
- PlayerControllerAccess - This provides a plethora of functions for changing gameplay values for the player, as well as events to hook into and different status information on the player such as action state and velocity. The gameplay adjusting functions (typically ending in "Scalar") all take a float number value that modifies the existing value by the provided one, rather than overriding it completely. For instance supplying a value of 2 to any of these functions would double the existing speed, whereas .5 would half it.
- LevelAccess - This contains functions for basic level control such as triggering a win or fail screen, accessing the level time, or adjusting scene visual and lighting effects such as fog and skybox.
- CameraAccess - This exposes the camera object and its post processing objects, which in theory would allow for additional post processing effects to be added in.
- GUIAccess - This exposes certain GUI functions and control. This primarily is adjusting visibility, setting pop in dialogue as seen in boss fights, and controlling the health/stamina bar used in boss fights.
Check out the individual files for a full list of all the methods to access!
UPLOADING A LEVEL
Same approach also goes for updating.
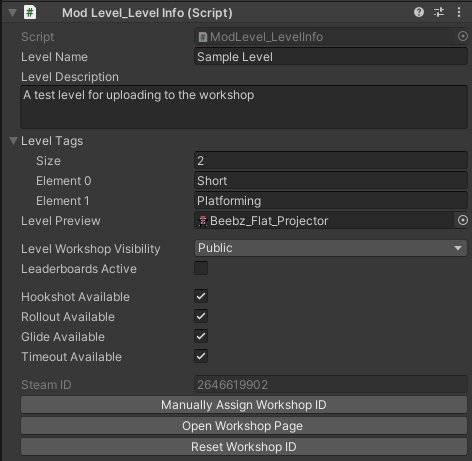
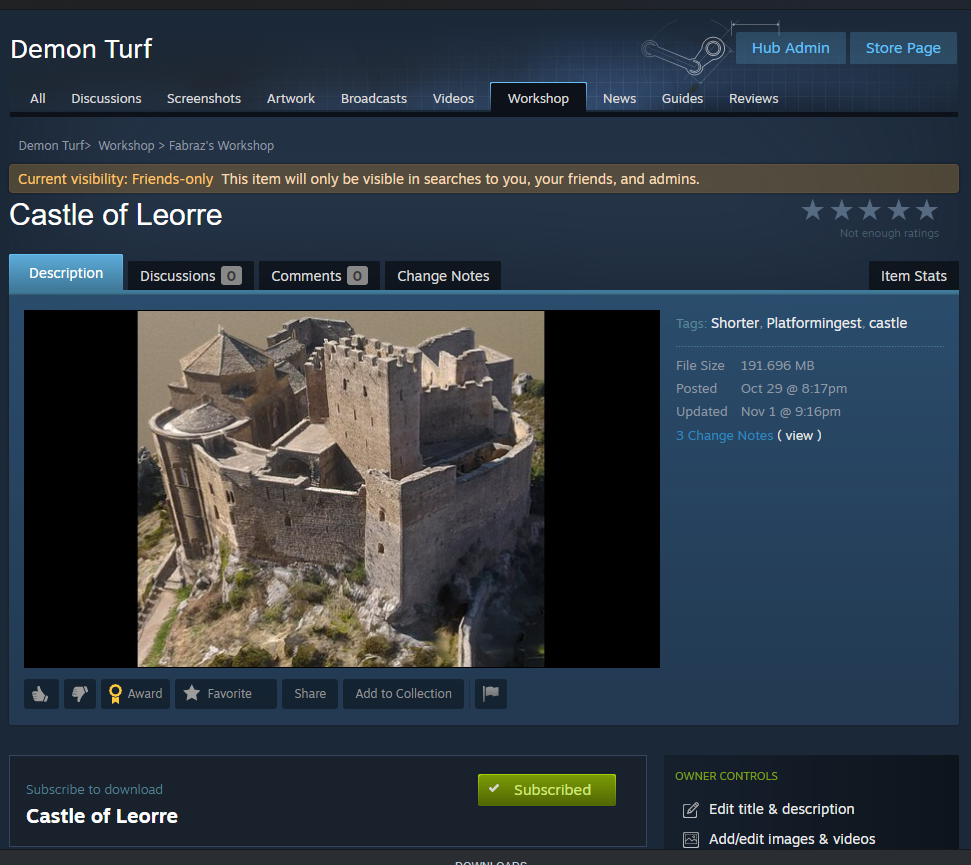
The first thing you need to look at is "Level Info" under "Managers". This is where you set the level's name, description, tags and thumbnails. Additionally, you can set whether leaderboards are active which are worth turning off if you are still testing the level. You can also upload them privately first for testing purposes as well. You can also set what turf abilities the player has available to them. Do not touch the Steam ID, this will be set automatically on upload and will remain the same ID to make sure re-uploads properly replace the old upload on Steam's Workshop. If the first upload fails, try resetting the ID.
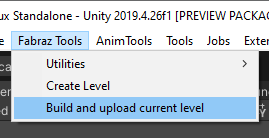
Once everything looks good to go, go to Fabraz Tools > Build & Upload current level. Make sure Steam is open and you are logged in with the account you want to upload with. This process takes a bit of time, as it packs the level and submits it to Steam's Workshop. It will also prompt you for any patch notes you'd like to submit for the latest changes.
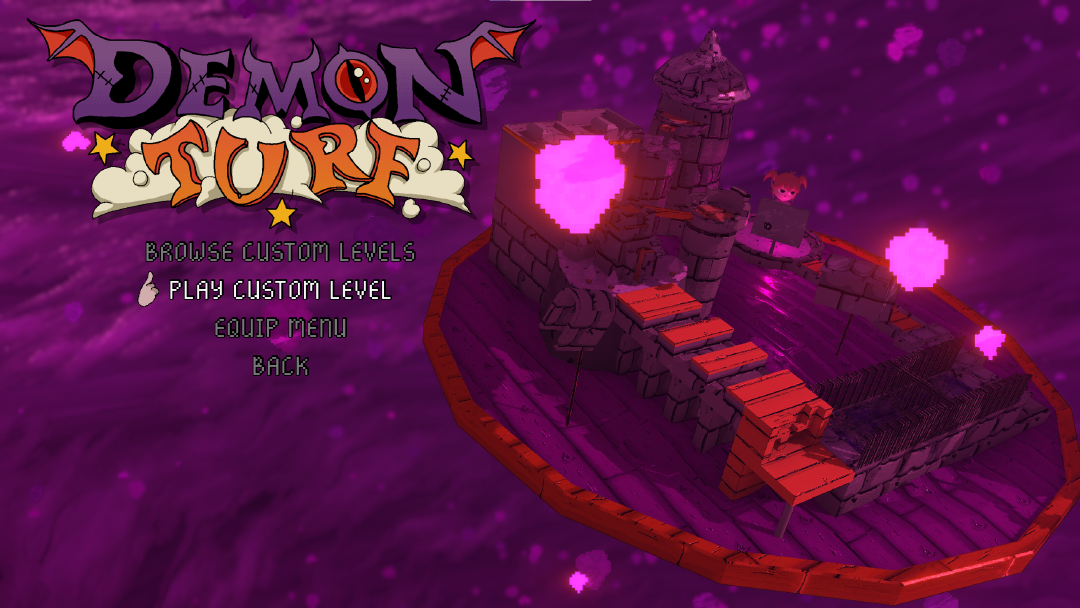
Once this process is done, you can now see your level in Steam's Workshop. Subscribe to it and it will be downloaded into your Demon Turf install. Now all that's left to do is start the game, go into "Custom Levels" and try it out! Remember, you can always update the level to make changes! (Steam might think the game is still running by the way, so to open the actual game you might have to close the Unity editor first.)
FAQ
How many levels can I make?
As many as you'd like. Just make sure to use Fabraz Tools to create & upload them.
I wish I could add [BLANK]
You might be able to! Creating new scripts won't work, but you can combine existing scripts and components to create new behaviors for enemies, hazards or interactables. Feel free to get creative and extend the tools already provided!
Can I build my own game using these assets & scripts?
Absolutely not, the license only allows you to upload custom levels to Demon Turf. This also dosn't act as a working copy of Demon Turf, a lot of essential scripts & proprietary assets have been removed for security reasons.
(NEW) What about LUA?
It's officially supported since a recent a patch! Check out the LUA section of this documentation page to learn more about what, and how, you can directly modify some game behaviours! Let your creativity flow!
Do I have to use Unity?
Yes, otherwise this won't work. It will have to specifically be 2019.4.26f1 as well otherwise the addressable bundles might fail. The big benefit to this method is that you, essentially, have all the tools that we had available to make levels.
Can I only use the stuff you provide?
Nope! Create your own environments, your own meshes, upload your own music... Go wild! There aren't many limitations in what kind of levels you can create!
Do I need to keep the scene hierarchy you provide? What about folder structures?
We only organized them this way for your convenience. You can change the scene hierarchy however you want as long as you keep the essential manager files in place. And you can place your assets and add new folders/files however you'd like. This is, at the end, just a semi-filled Unity project like any other.
I'm getting an error uploading that says the name is too long?
Yup, an odd Unity limitation. Make sure your Demon Turf Custom Level Creator install location isn't too long a path name. If the location path is under 100 characters long, that should work.
I've encountered an error/issue/problem! How do I fix it?
There's an endless number of strange issues and bugs that crop up when working in a game engine like Unity. Some require some indepth debugging, but a good number can be resolved with some standard tricks, including:
- Restart Unity and/or your computer. Turning it off then on again has stuck around as a meme because it works more often than not!
- Delete your Library folder. This is a sort of workspace/staging area for the engine, where it stores lots of its data separate from the explicit assets and configurations you supply. Sometimes these can get corrupted, so deleting the Library and letting Unity recreate it can fix some issues. Just be aware it might take some time.
- Reset to a default Layout in the upper right. A whole host of editor graphical bugs have been resolved for us in the past with this trick. Can't tell you why, but its much better to try earlier than spending hours on a bug that disappears when resetting some window positions...
So, what kind of things can I trigger using the "TriggerEvent" component?
A lot, and you can determine what the trigger collider's shape is and what activates it. Whether it is the player entering or exiting it, or a moving platform, or an enemy... Here are a few often used ones:
- On ProjectileSpawner Components (Bullet Emitter GameObjects): FiringProjectiles, SetSpeed, SetRateofFire, SetProjectile
- On MovingPlatform and RotatingPlatform Components (Moving Platform & Rotating Platform GameObjects): SetSpeed, ResetPlatform
- On "Unlocker" GameObjects such as Blocker Bridge, Blocker Door: SetActive(Bool) on Closed & Open children.
- On "Blocker Treasure Chest" GameObject's Animator: SetTrigger "Open"
- On GameObjects in general as well as "Cut Camera Interactions": SetActive(bool)
Patch Notes (1.2)
Major Additions
- LUA scripting support to directly access & adjust gameplay values, like changing Beebz's basic movement!
- NPCs & Custom dialogue support!
- Fully supported 2D segments! (NEON SPLASH ADDITION)
Additions
- Booster rings, zoom through space! (NEON SPLASH ADDITION)
- Moving cranes, adjustable radius and all! (NEON SPLASH ADDITION)
- Flying cage, for some fun unlockin methods! (NEON SPLASH ADDITION)
- Pumping pillars, these bad boy make you yeet! (NEON SPLASH ADDITION)
- Moving & rotating Octagons, these can be quite nasty! (NEON SPLASH ADDITION)
- Obstruction variants, to hide objects behind others! (NEON SPLASH ADDITION)
- Teleport doors, including the tracking camera! (NEON SPLASH ADDITION)
- Neon Splash Biomes, including their music! (NEON SPLASH ADDITION)
- Reactive beat manager, to make objects bop to the music! (NEON SPLASH ADDITION)
- Bullet hell scripts, time to go crazy! (NEON SPLASH ADDITION)
- Eye tracker script, if you need something to pivot-look towards Beebz like bosses!
- Smaller volumetric clouds, for some overhangs!
Adjustments
- A lot of prefabs now feature commentated instructions on how to use them!